Introduction:
In the world of software development, creating CRUD (Create, Read, Update, Delete) application is a common task. These applications allow users to interact with data by performing basic operations like adding, viewing, updating, and deleting records. In this blog, we will explore how to build a simple CRUD Windows application using C#. We'll walk through the entire process, from designing the user interface to implementing the functionality and providing a smooth user experience.
In this article, we'll be building a simple CRUD application in C# using Windows Forms. We'll be using Visual Studio, which is a popular integrated development environment (IDE) for Windows applications.
Building a Simple CRUD Application in C# using Windows Forms:
Step 1: Setting up the Project
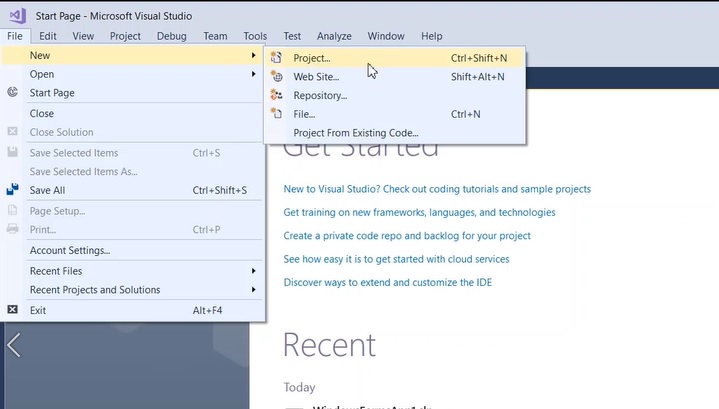
To begin, launch Visual Studio and create a new Windows Forms project. Navigate to the "File" menu, select "New," and then "Project."
Step 2: Project Configuration
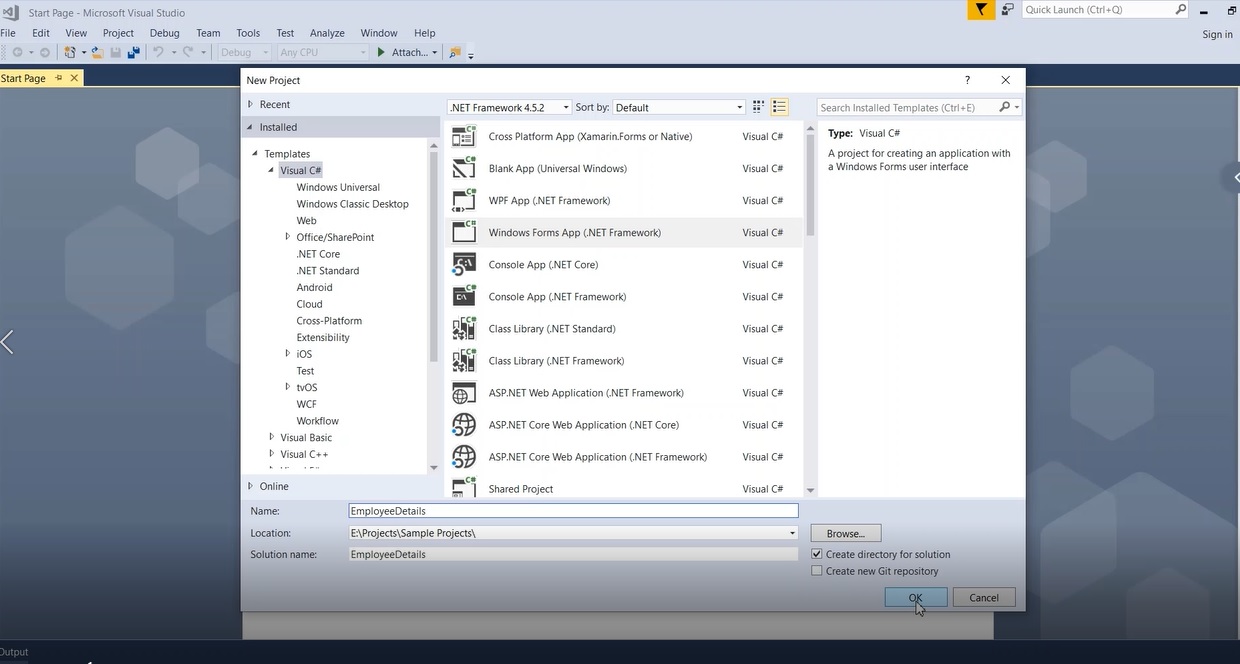
In the "New Project" dialog, choose the "Visual C#" templates, select the ".NET Framework" option, and proceed by selecting "Windows Forms App (.NET Framework)." Assign a name to your project and specify the desired location to save it. Finally, click on the "Create" button.
Step 3: Adding Controls
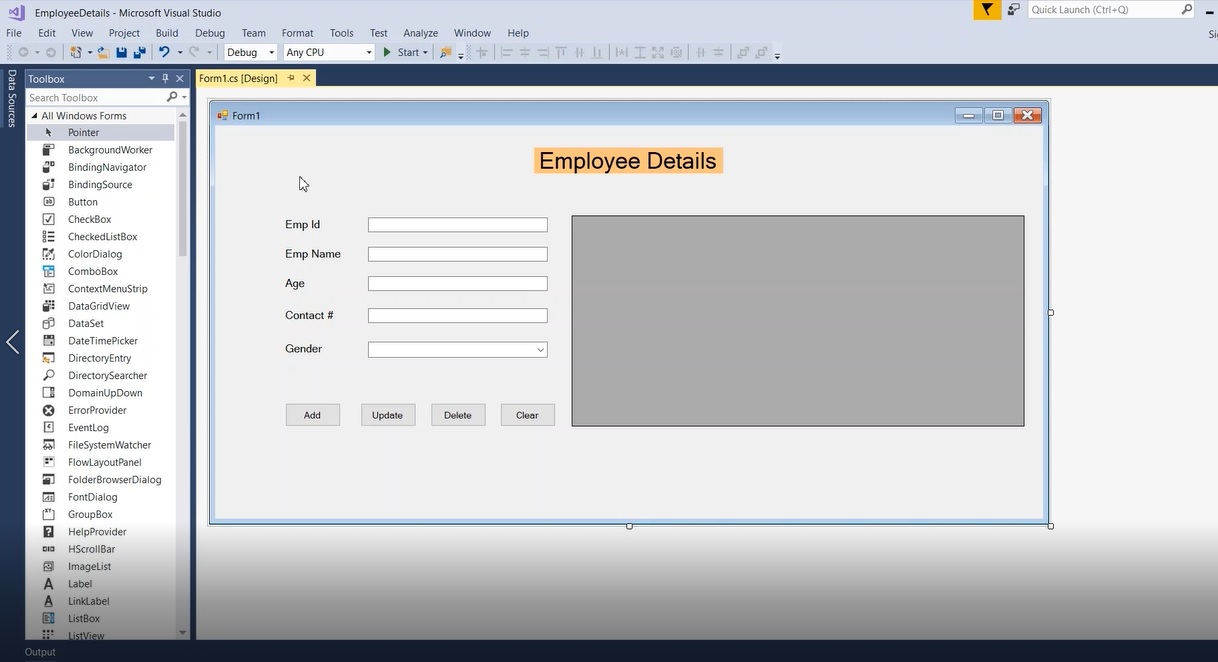
Once the project is created, it's time to design the user interface. Access the "Toolbox" section in Visual Studio and add the necessary controls to your form. Ensure you assign proper names to each control for easy identification and accessibility.
Step 4: Creating the Database
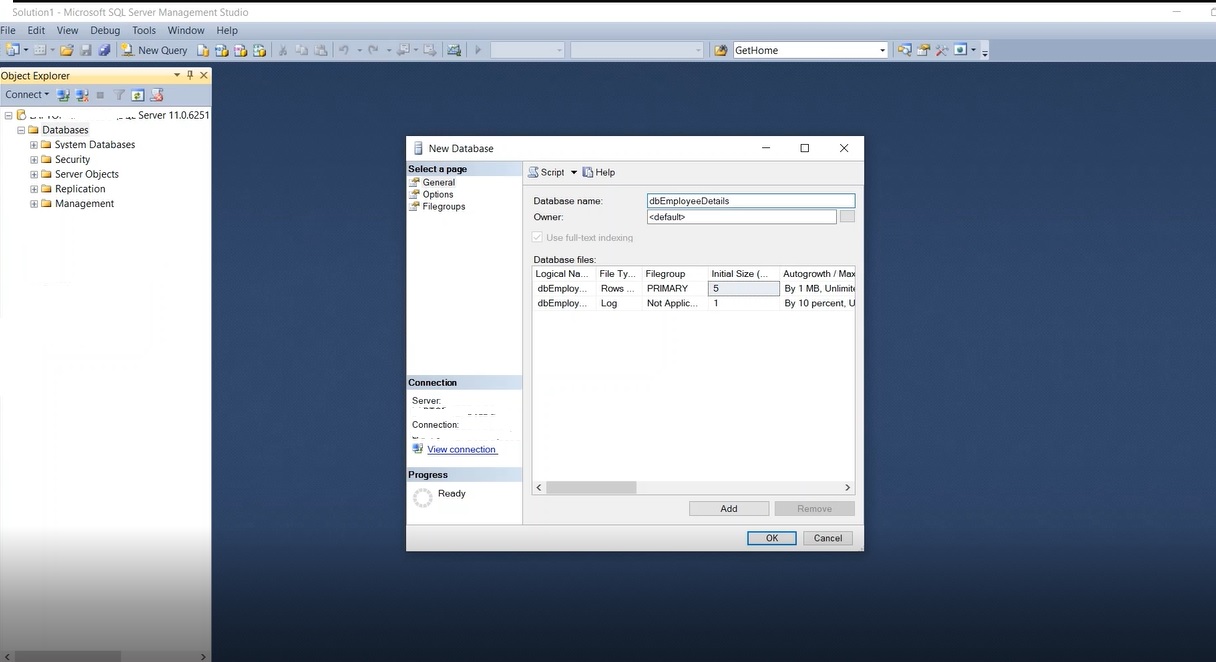
To store and manage data, we will set up a database in SQL Server. Open "Microsoft SQL Server Management Studio" and right-click on the "Database" folder. Select "New Database" and provide a name for your database, such as "dbEmployeeDetails." and click "OK"
Step 5: Designing the Table
In the SQL Server Management Studio, execute the following query in the SQL window to create a new table called "Emp_details" within the database:
CREATE TABLE [dbo].[Emp_details](
	[EmpId] [int] NOT NULL,
	[EmpName] [nvarchar](50) NULL,
	[EmpAge] [int] NULL,
	[EmpContact] [int] NULL,
	[EmpGender] [nchar](10) NULL
)
You can verify the table structure by right-clicking on the table and selecting "Design." This will display the columns and their respective properties.
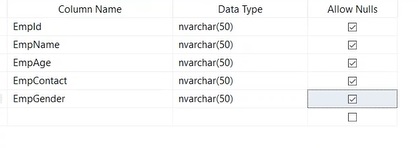
In the upcoming article, we will cover the database connection setup from the Windows application and delve into CRUD operations (Create, Retrieve, Update, and Delete).


Nice Article!