The ASP.NET MVC is a web application framework that is developed by Microsoft, which implements the model–view–controller (MVC) design pattern. This article is for beginners who want to create their first Asp.Net MVC application.
Step 1:
Open your Visual Studio and select File > New > Project and Select Web > ASP.NET MVC Web Application and provide the name as MVCApplication. Choose the Location and Click OK.
For Visual Studio 2019, Select Create New Project > Choose Asp.Net Web Application (.Net Framework).
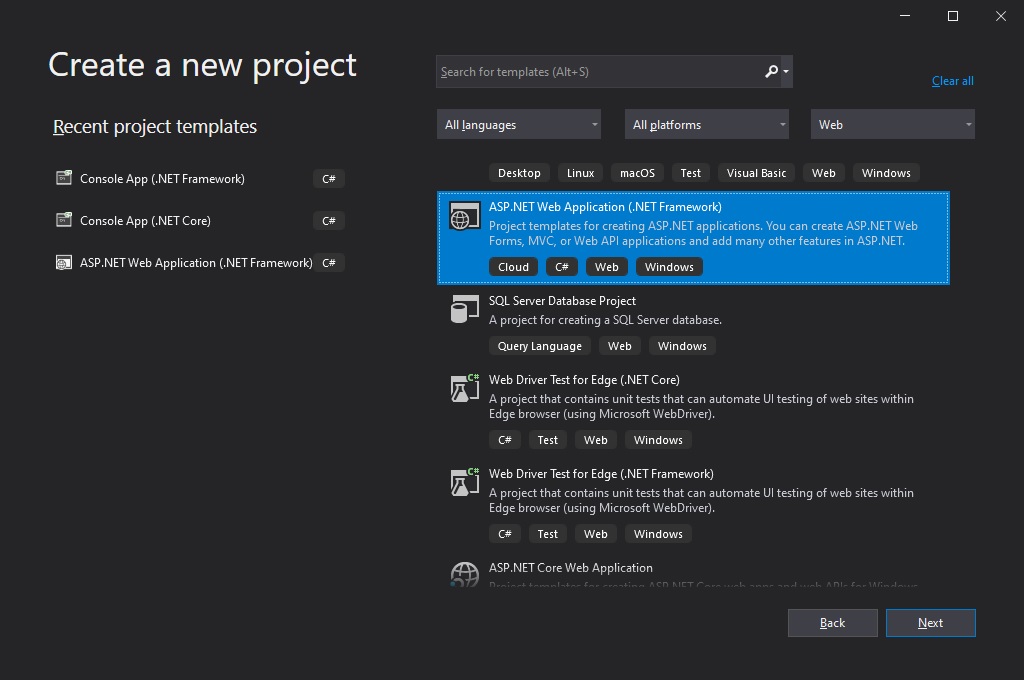
Step 2:
And Provide the project name as MVCApplication > Choose the Location and .Net framework and Click Create.
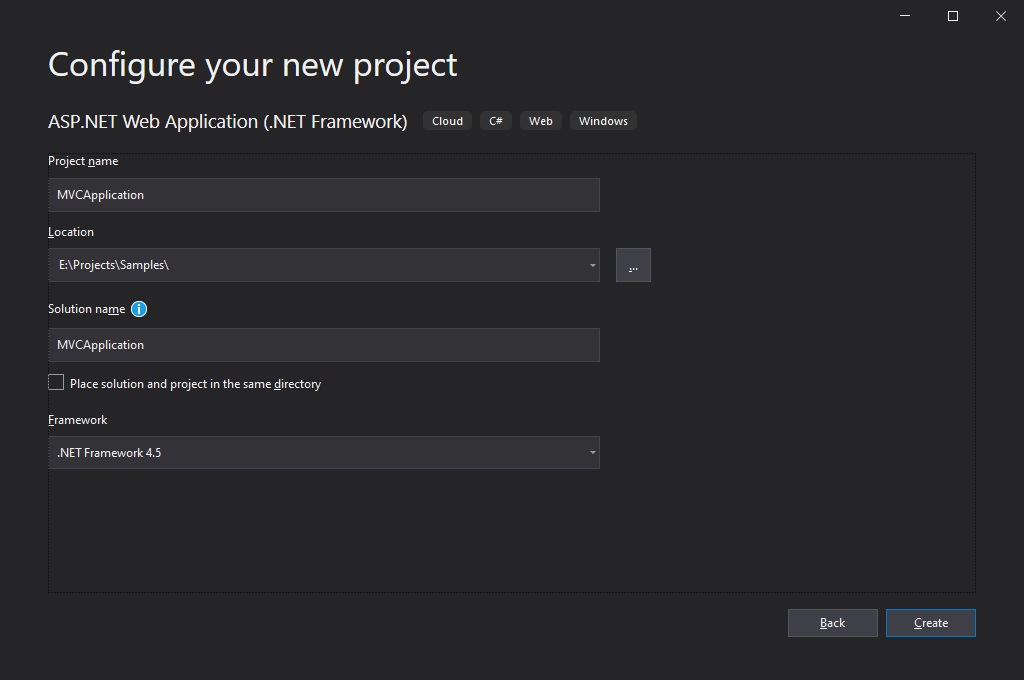
Step 3:
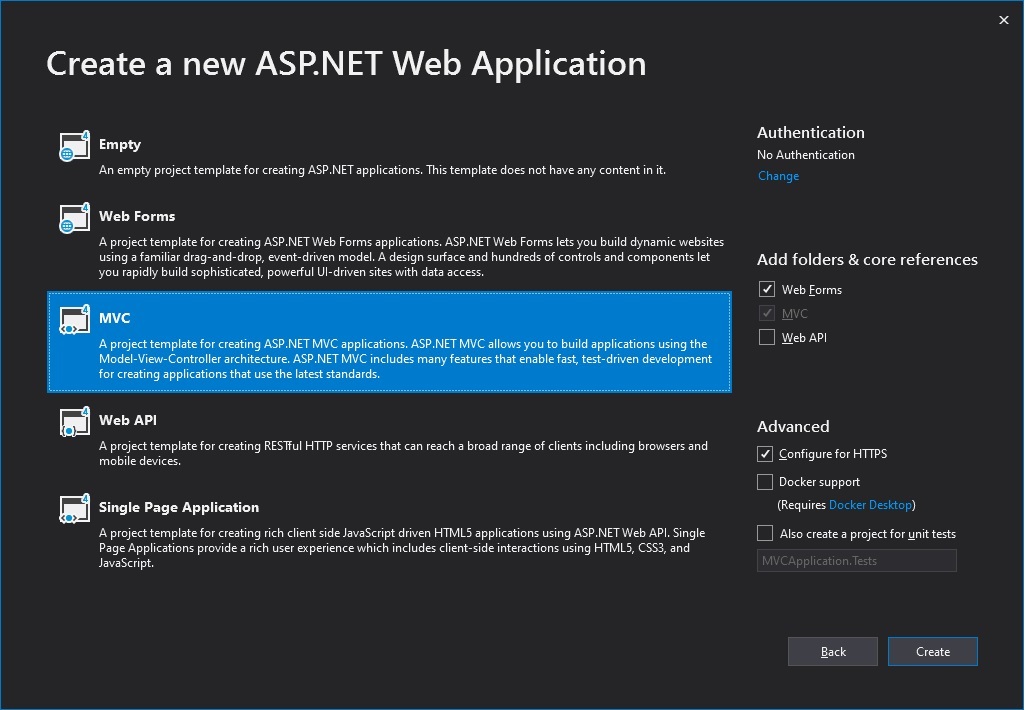
The below window will appear. Choose MVC and Select "Web Forms" and Click Create to create the MVC web application.
Once the MVC Application is created, you can see the project files in solution explorer as shown below, It will create HomeController and Views by default.
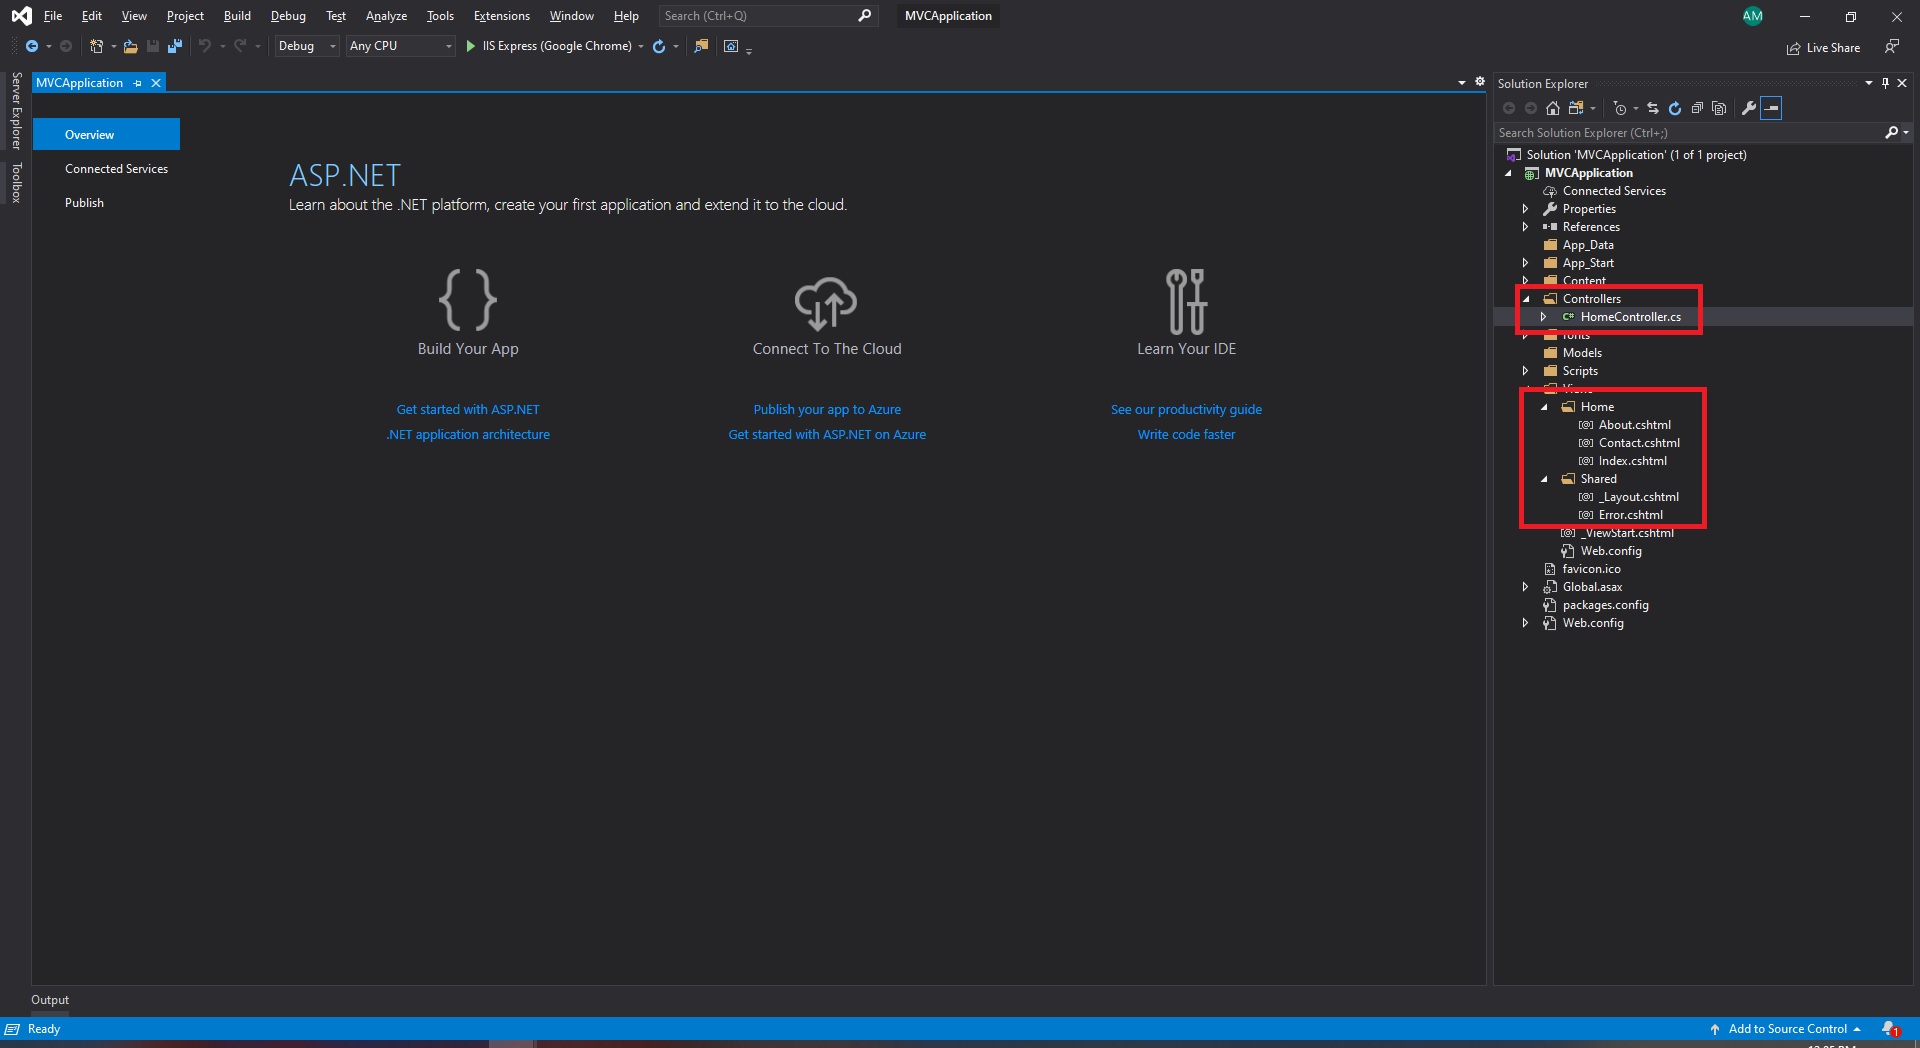
When you open the HomeController, you will see Index, About, and Contact action methods.
using System;
using System.Collections.Generic;
using System.Linq;
using System.Web;
using System.Web.Mvc;

namespace MVCApplication.Controllers
{
    public class HomeController : Controller
    {
        public ActionResult Index()
        {
            return View();
        }

        public ActionResult About()
        {
            ViewBag.Message = "Your application description page.";

            return View();
        }

        public ActionResult Contact()
        {
            ViewBag.Message = "Your contact page.";

            return View();
        }
    }
}
Step 4:
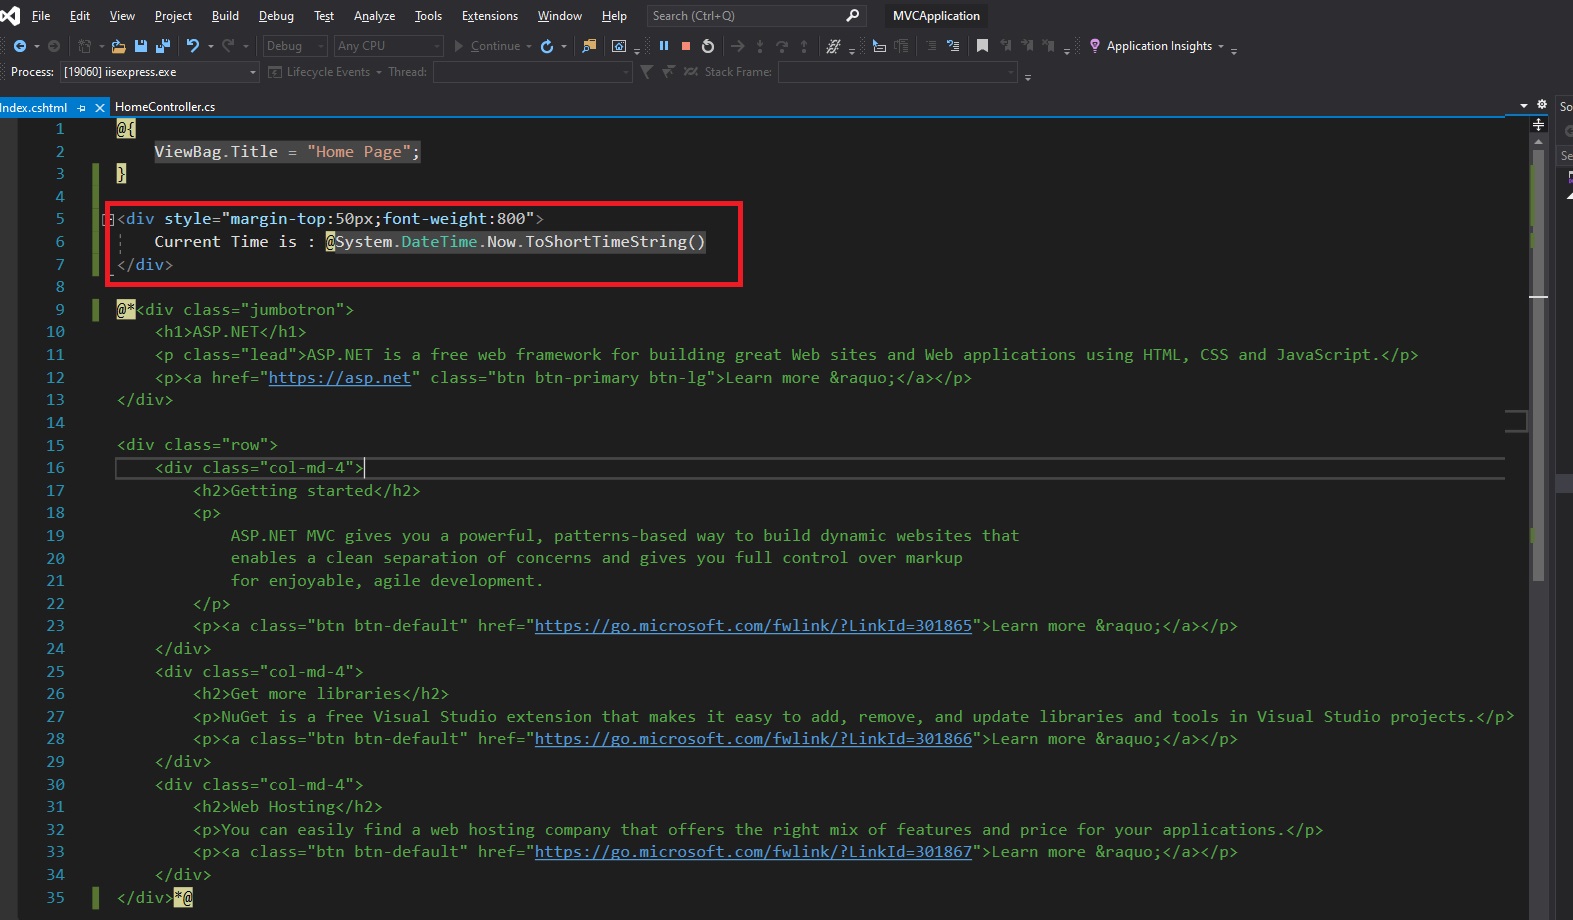
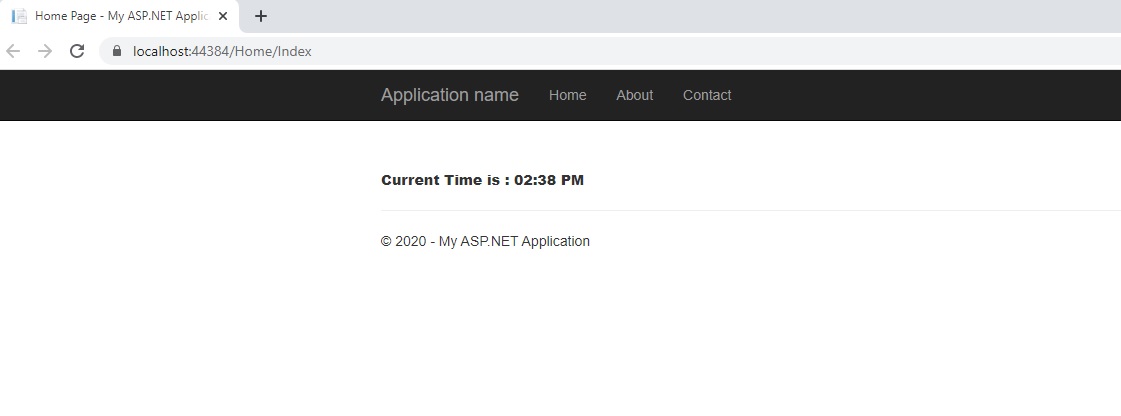
I have made a change in Index view and commented on the unwanted text and added the code to display current time as shown below,
Output:


Comments (0)