Java Environment Setup (Local and Permanent)
In order to develop and execute a java program/application, we need JDK to be available in our local machine. Today, in this lecture we are going to perform the following steps in order to make our system ready for Java development:
- Download and Install JDK
- Set up Environment path: There will be two approaches here i.e,
- Temporary
- Permanent
Step 1: Download and Install JDK
- Visit the official website of Oracle https://www.oracle.com/in/java/technologies/javase/javase-jdk8-downloads.html to download the J2SE development kit. Please note, that JDK is platform dependent. Hence it is advisable to refer to the file description before downloading.
- Once downloaded, the installer(extension .exe) is to be run in order to install both JDK and JRE. All the necessary terms and conditions are to be accepted for a successful installation.
- Upon successful installation, we will see a folder Java inside C:\Program Files.

Step 2: Set up Environment path
The JDK so installed is almost ready to use. But we will be able to effectively use it only after the environment is set up. But let us understand why is this step necessary.
Let us take an example. Whenever you feel hungry, you visit the kitchen. In order to visit the kitchen, the roadmap to the kitchen should be known. You are a member of this home, so you can easily find out the kitchen. But consider, a guest arrives and he/she is hungry. He/She is not aware of the kitchen location, so you need to direct him/her.
The purpose of Environment Setup serves the same intent. Here in the above example, you and the guest are java programs, and the kitchen is JDK containing necessary libraries.
Extending our previous example, we can have two approaches to direct our guests. Either, we explicitly tell them whenever they ask for it, or we have a kiosk at our common room with the location to the kitchen mentioned in it.
The first approach is temporary, while the second one is permanent.
So let us set up our path in both ways.
Temporary Path Setup
In order to set the temporary path, you need to proceed with the below-mentioned steps:
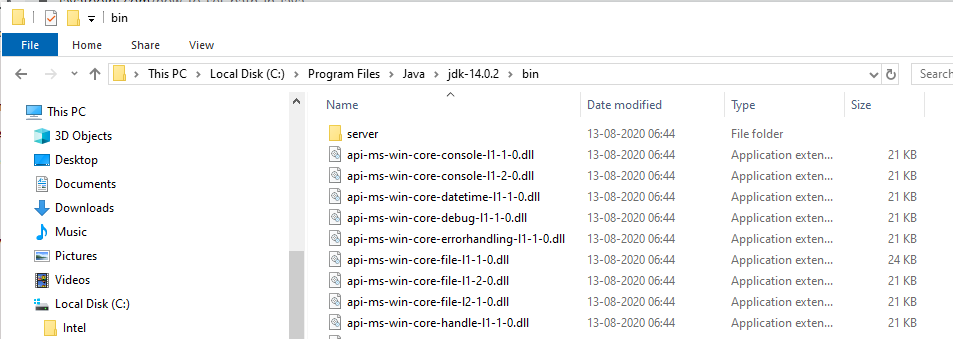
- Open C drive. Go to Program Files -> Java -> jdk-14.0.2 -> bin. Copy this path.
- Open command prompt
- Write the command set
path = { The path selected in step 1 }
Pictorial Impact:
Select the JDK Path:
Before Setting the path, the compiler(javac) command cannot be found

After Setting the path, the compiler(javac), and an interpreter(java) command is found successfully

It is not preferable to set java path temporarily, as it is not feasible and effective.
Permanent Path Setup
In order to set the permanent path, you need to proceed with the below-mentioned steps:
- Open C drive. Go to Program Files -> Java -> jdk-14.0.2 -> bin. Copy this path.
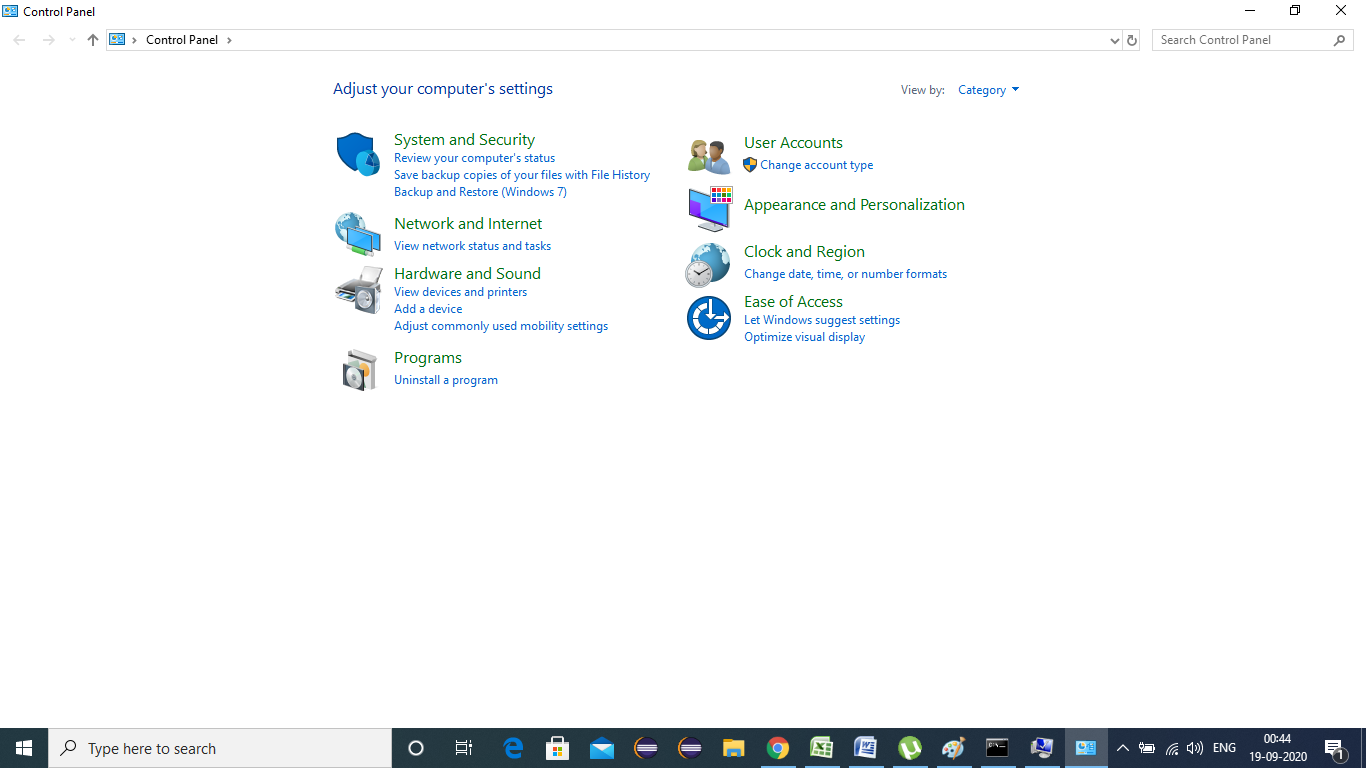
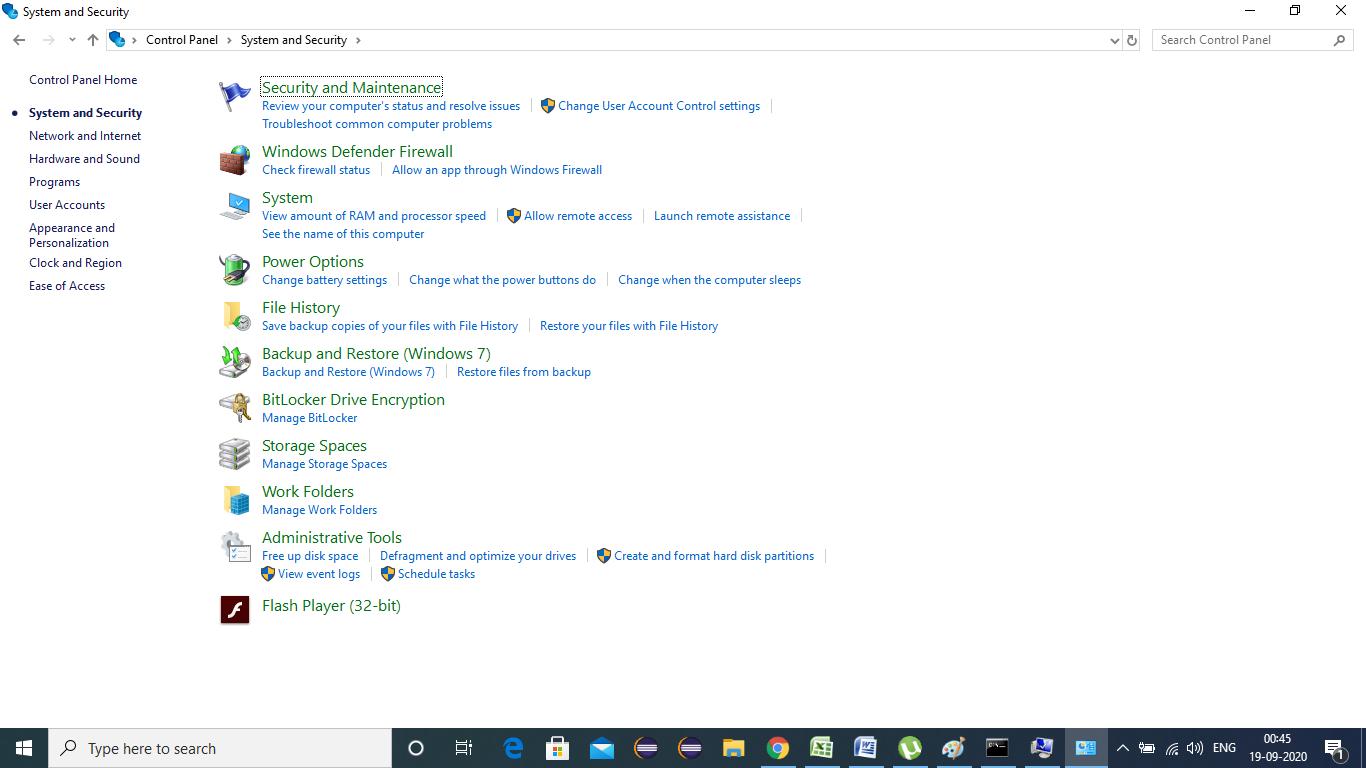
- Go to Control Panel -> System and Security -> System
- On the left menu, click Advanced System Settings.
- Go to the Advanced tab, and select Environmental Variables.
- You will be seeing, User variables and System Variables. Opt for a new tab of the User Variables part. In the variable name write path, and for the variable value, paste the path copied in step 1.
- Proceed with a series of OK and your set is complete. Now all the library files of JAVA can be accessed from any drive without any hassle.
Pictorial Impact:
Step 1: Select the JDK path
Step 2: Open Control Panel
Step 3: Select System And Security
Step 4: Select System
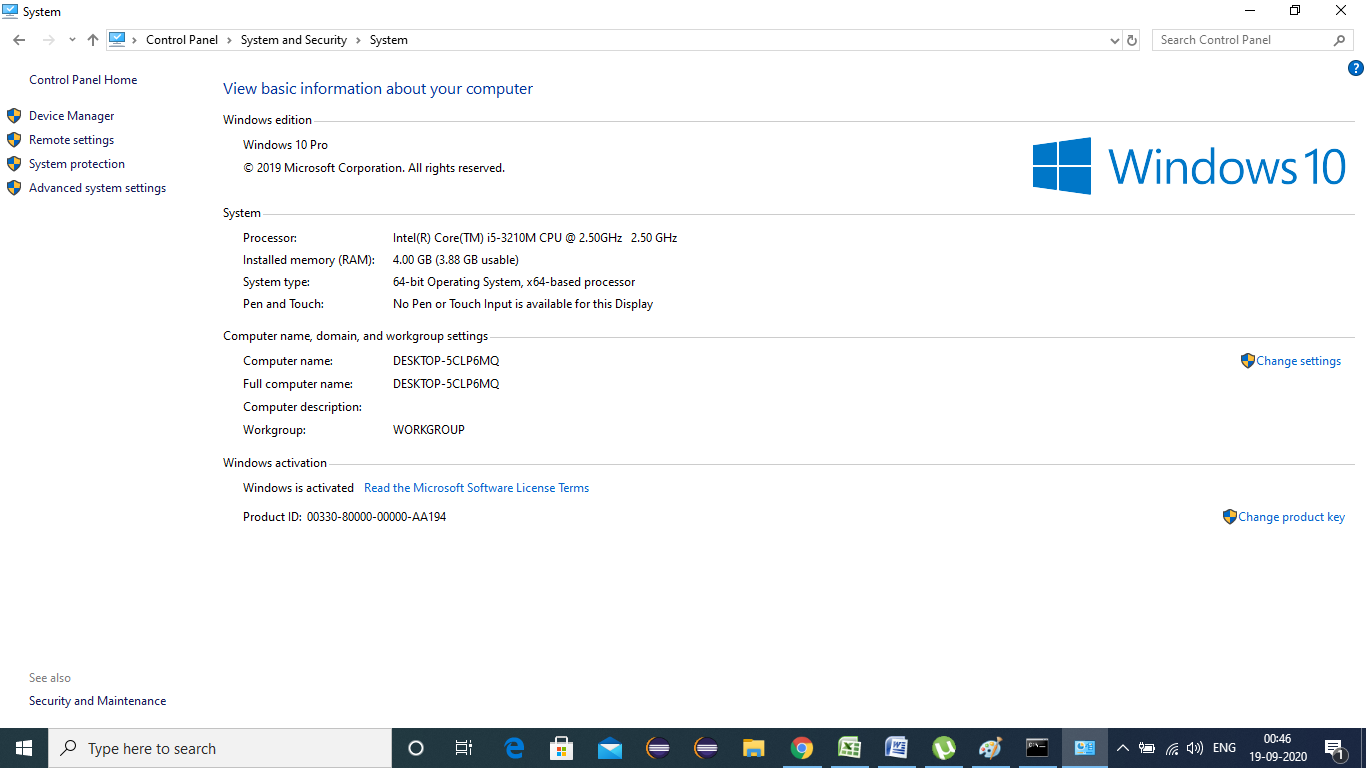
Step 5: Select Advanced System Settings
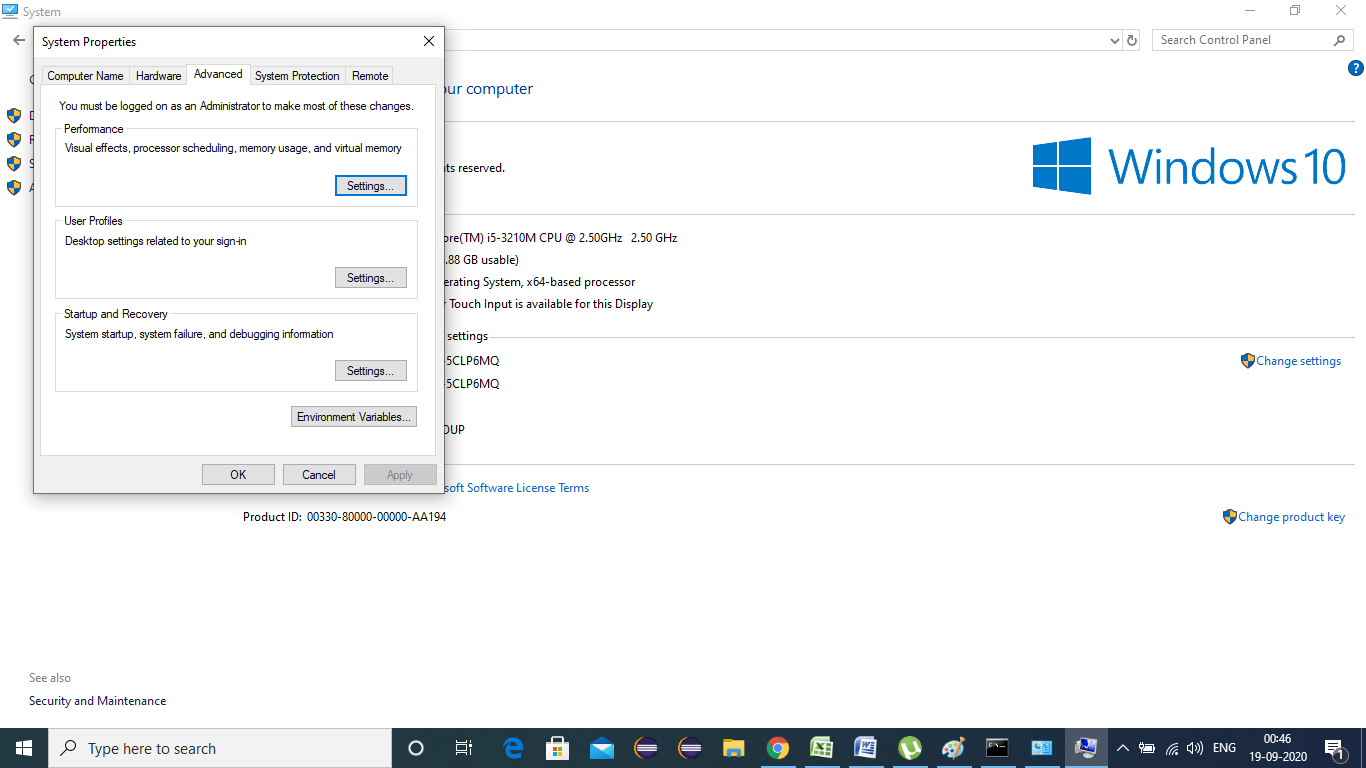
Step 6: Select Environment Variables
.png)
Step 7: Select New Environment Variables and choose new from the user variables section
.png)
Step 8: In the name section, enter a valid name, and in the value section, enter the bin path copied in step 1.
Variable Name : Java_Path
Variable Value : C:\Program Files\Java\jdk-14.0.2\bin
.png)
After complete Environment Setup, we are ready to write our first Java Program.


